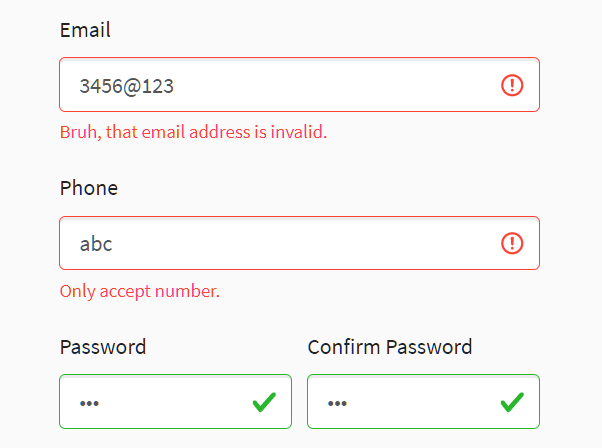
Building forms in React can be a complex task, especially as your application grows in size and complexity. Managing form state, validation, and user interactions can become a challenge. This is where libraries like Formik come into play, offering a streamlined and efficient way to handle forms in a React application.
Form Validation

Form validation is a very important aspect of web development that ensures data entered into a form meets specified criteria before submission. Form validation helps to improve user experience, prevent malicious inputs and maintain data integrity.
Validation can be performed on the client side using JavaScript for real-time feedback and also on the server side to ensure consistency and security. Common validation types include required fields, length constraints, numeric formats, and more. Implementing thorough form validation is essential for creating robust and user-friendly web applications.
Do we need to validate our forms?
Imagine having a helpful friend double-checking everything you write on a job application letter, so things work smoothly and nothing goes wrong, this is how form validations work. Form validation makes sure the information you type into forms is correct and safe. Form validation ensures data accuracy, user-friendly interfaces, and security by confirming that the information entered into forms meets required standards, preventing erroneous or malicious submissions.
Formik

Formik is a robust, widely adopted open-source library designed to streamline the often intricate process of managing forms in React applications. As forms play an important role in user interactions with web applications, Formik reduces the complexities associated with form development by providing a comprehensive set of components, utilities and tools.
In your terminal, you can run the command below to install Formik
npm install formik //using npm
yarn add formik //using yarn
YUP
Yup is one of the validation methods available. It is a library that simplifies the validation process by allowing developers to define validation schemas using a concise and expressive syntax. To get started, you need to install it in your React project.
In your terminal, you can run the command below to install Formik
npm install yup
# or
yarn add yup
Validation Schema: Yup supports validation for various data types such as strings, number, dates, and more. Creating basic validation schemas involves chaining methods to specify rules.
   const validationSchema = Yup.object().shape({
      username: Yup.string()
        .required('Username is required')
        .min(3, 'Username must be at least 3 characters')
        .max(15, 'Username must be at most 15 characters'),
      email: Yup.string().email('Invalid email address').required('Email is required'),
      password: Yup.string().required('Password is required'),
    });
Grab your cup of coffee and let's code!

Two major things to remember:
ValidationSchemas
Here is a typical example of a validation schema using YUP
 const formValidationSchema = yup.object().shape({
     firstName: yup.string().required("First Name is required"),
     lastName: yup.string().required("Last Name is Required"),
   });
" .string() ": this simply indicates that a string-type input is expected in the form.
".required("First name is required")": this helps to pass the error message "First name is required". If the requested form input remains empty, the form will not be submitted.
InitialValues
 const formInitialValues = {
      firstName: "",
      lastName: "",
  }
Here, a set of empty strings are being passed to the field names "firstName, lastName" to indicate that inputs are expected in the forms.
To ensure writing neater, readable codes, we will be writing our validationSchema and InitialValues in a separate component and exporting to the component where our basic form input is written.
NOTE: Do not forget to install the Formik and yup packages in your project
Let us proceed.
Here is the component containing both the validationSchema and InitialValues
import * as yup from "yup";

export const validationComponent = () => {

//here is the validation Schema
  const formValidationSchema = yup.object().shape({
    firstName: yup.string().required("First Name is required"),
    lastName: yup.string().required("Last Name is Required"),
   })

// here are the Initial Values
  const formInitialValues = {
      firstName: "",
      lastName: "",
  }

  return {
    formValidationSchema,
    formInitialValues,
  }
};
Let's move to the form component, where we will be importing our validationSchemas and formInitialValues
import { useFormik } from "formik"
import { validationComponent } from "../validationComponent";

const BasicForm = () => {
// we'll make the validationSchema and formInitialValues accessible
// by destructuring them from our validationComponent
const { formValidationSchema, formInitialValues } = validationComponent();

//Here, using the useFormik hook method, these properties are being extracted
//using object destructuring and assigned to variables for further use.

   const {
    values,
    errors,
    touched,
    isSubmitting,
    handleSubmit,
    handleChange,
    handleBlur,
  } = useFormik({
    initialValues: formInitialValues,
    validationSchema: formValidationSchema,
    onSubmit,
  });

// ... Form rendering code

  return (
    <form onSubmit={handleSubmit}>
      <input
         id='firstName'
         type='text'
         placeholder='John'
         value={values.firstName}
         onBlur={handleBlur}
         onChange={handleChange}
      />
      {/* to display validation error message*/}
      {errors.firstName && touched.firstName && (
     <p style = {{ color: "red", fontSize: "12px", marginTop: "0px"  }}>
      {errors.first}</p>)}

       {/* follow same steps for lastName input */}
      <button type="submit">Submit</button>
    </form>
  );
}

export default BasicForm;
Excluding my additional CSS, provided below is a typical validation error message displayed once a user tries submitting an empty form.

Best Practices and Tips
Read the Documentation: Familiarize yourself with Formik's documentation to understand its features and capabilities.
Separate Component: Break down your form into smaller, reusable components. This makes your code modular and easier to maintain.
Yup for Validation: It is advisable to integrate Yup for validation schemas with Formik. Yup provides a clean way to define and handle form validation.
Final Thoughts on Building Forms in React with Formik
Formik simplifies form management by providing a set of components and utilities, thereby reducing boilerplate code and making your codebase more concise. While Formik comes with a set of default behaviors, it is flexible enough to accommodate various form patterns and can be extended or customized based on specific project needs
I do hope this article has been of help to you. You can also visit the official Formik documentation website.
If you desire to learn more extensively, this YouTube resource should help.
You can also reach out and connect with me via https://www.linkedin.com/in/durosinmi-victory/
Toodles!
